
This generates a note in a half-transparent rectangle with rounded corners, which is animated as: background pulled-down → note faded-in → note faded-out → and background pulled-up.

NoteStyle and NoteBgStyle are sample styles, which you can redefine as you like. No preview.
Generates vertical or horizontal color gradients. First you can drag mouse to select the area where you'd like to generate color gradient. Then hit [Shift] + [G] and the poped-up dialogbox already knows the area. So you can just select colors etc. and click OK.


Alternatively, you can let the application automatically find the text area by hardware scanning, but that is slow, not recommended.
The shortcut was [Shift]+[4] before version 0.1.2.0.
The Grad4v2 tool generates a set of ASS Dialogues that draws a lot of small rectangles to "remove" the foreground image. This works well only when the background is roughly similar.
Suppose you wanted to remove the foreground image in the rectangle area, script-wise, in the first picture below. Hit [Shift] + [4] and the dialogbox already knows the area, but in this tool, you'll need to manually adjust the parameters so that both width and height will be multiples of 8. The second picture shows the result.


This sample is rather meaningless, but the point is, just drawing one big rectangle generally doesn't work well to hide the foreground, unless the background is truly single-colored. The Grad4v2 tool will fake up the background by interpolating the colors, using the pixels on the given four edges. No preview. No timestamps. You need some manual work, to use it.
NOTE: Original text on some background-> (Grad4v2's background + new text from ASS) fading in = cross-fading, from the original text to the new text.
Makes the current Dialogue striped-colored. The border lines can be rectangular (vertical), or diagonal (backslash-wise, or forwardslash-wise). This dialogbox doesn't automatically detect the area, so first check the Y0, Y1, and Y2 values as shown in the dialogbox and manually input them. If the target text is a one-liner, Y2 is not needed. If the target text is one-liner and you are generating simple rectangular stripes, you can just specify Y0 = PlayResY, Y1 = 0.


The sample colors are placeholders, which you can edit manually as you like.
The 'Left' parameter can be set by clicking the desired point on the picture before opening the dialogbox. (The vertical position of the point is ignored.) If 'Centered' is checked, the 'Right' parameter is automatically calculated from the 'Left' parameter.
0.0.9.57+: If you check the "Set Y0/Y1/Y2" option, Y0/Y1/Y2 values are set according to the rectangle you draw on the picture. If the checkbox is checked or unchecked, the Y0/Y1/Y2 values are saved for the next session. If the checkbox is indeterminate, those values are not saved.
0.0.9.55+: If 'Centered' is not checked, the 'Left' and the 'Right' parameters can be set by drawing a rectangle on the picture before opening the dialogbox. (The vertical position of the rectangle is ignored.) If 'Centered' is checked and if a rectangle is drawn by mouse dragging before opening the dialogbox, the 'Left' parameter is picked up from the left side of the rectangle, while the 'Right' parameter is automatically calculated to center the selected area.
0.0.9.55+: If the 'Old Methods' checkbox is checked, 'Automatic Adjustment' is compatible with version 0.0.9.54, where the 'Unit Width' parameter is ignored. If this checkbox is clear (which is true by default), a new algorithm is used in 'Automatic Adjustment', trying to divide the text between the 'Left' and 'Right' points into cells of the same width. The width of each cell will be decided to be the best approximation of the 'Unit Width' parameter under the condition that the number of the cells will be even (2, 4, 6, 8,...).
0.0.9.55+: In rectangular clipping, if the 'Old Methods' checkbox is checked, the left point of the first cell is the 'Left' value and the right point of the last cell is the 'Right' value; while if the 'Old Methods' checkbox is clear, the left point of the first cell is 0 and the right point of the last cell is PlayResX, unless a negative parameter is specified or 'Centered' is unchecked. For instance, if a 600-pixel length, Left=20, Right=620, is divided into 6 pieces in PlayResX=640, and if the old algorithm has it as 20-120-220-320-420-520-620, the same would result in 0-120-220-320-420-520-640 by the new algorithm. The two are basically same, but the second one is safer: the first method would cause a serious problem if the subtitle was edited and became a little longer after the strips were generated.
0.0.9.56+: Diagonal clipping has been slightly altered to get better results. You can still used the old methods if the 'Old Methods' option is selected.
Unit is Number of Cells (0.0.9.56+): By default, the "Unit" value is width in pixels (called "Unit Width" in previous versions). However, if the "Unit is Number of Cells" option is selected, the Unit value is treated as a divisor, or the number of the cells, not the cell width, meaning you can specify the cell width indirectly so that the subtitle will be equally divided into the specified number. For instance, if the effect width is 200 pixels and you use the "Unit is Number of Cells" option with the Unit value=4, you will have four equally-divided sections (e.g. red-blue-red-blue), each of which is 50 pixels in width. Unlike the 'Automatic Adjustment' in the default mode, you can also specify an odd number in this mode. The odd number is generally not preferable in two-color stripes because of the obvious reason, but it may come in handy when you want to make three-color stripes (or five-color etc.) by manually editing the ASS later.
NOTE: If the skew value is large, the number of the cells in the resulted stripes may not look correct (typically too few by 1).
Converts timed lines into untimed tokens (as a plain text file). With this method, you can use your favorite timing tool for karaoke timing, even if it does not support karaoke. This topic is currently not well-documented.
(Example)
Dialogue: 0,0:00:02.13,0:00:08.43,Default,,0000,0000,0000,,Monita ga aoku hikaru
Dialogue: 0,0:00:08.91,0:00:12.54,Default,,0000,0000,0000,,Yume no yōni
Dialogue: 0,0:00:13.14,0:00:18.78,Default,,0000,0000,0000,,Toriko no yōni mitsumeteru

(Manually mark the token ends with /)
(A space is automatically treated as a token separator)
(Put the trailing {pause} mark if there is an explicit pause after that token)
Dialogue: 0,0:00:02.13,0:00:08.43,Default,,0000,0000,0000,,Mo/ni/ta ga{pause} a/o/ku hi/ka/ru
Dialogue: 0,0:00:08.91,0:00:12.54,Default,,0000,0000,0000,,Yu/me no yō/ni
Dialogue: 0,0:00:13.14,0:00:18.78,Default,,0000,0000,0000,,To/ri/ko no yō/ni mi/tsu/me/te/ru

(Output)
Mo
ni
ta@
ga{pause}@
a
o
ku@
hi
ka
ru{eol}
Yu
me@
no@
yō
ni{eol}
To
ri
ko@
no@
yō
ni@
mi
tsu
me
te
ru{eol}

(Now time each token like a normal line, except that
you don't need to decide the end time unless the token has {pause} or {eol})

Dialogue: 0,0:00:02.30,0:00:02.53,Default,,0000,0000,0000,,Mo
Dialogue: 0,0:00:02.53,0:00:03.01,Default,,0000,0000,0000,,ni
Dialogue: 0,0:00:02.83,0:00:03.13,Default,,0000,0000,0000,,ta@
Dialogue: 0,0:00:03.16,0:00:03.95,Default,,0000,0000,0000,,ga{pause}@ <--* end time needed
Dialogue: 0,0:00:04.72,0:00:04.91,Default,,0000,0000,0000,,a
Dialogue: 0,0:00:05.05,0:00:05.57,Default,,0000,0000,0000,,o
Dialogue: 0,0:00:05.49,0:00:06.11,Default,,0000,0000,0000,,ku@
Dialogue: 0,0:00:05.96,0:00:06.26,Default,,0000,0000,0000,,hi
Dialogue: 0,0:00:06.61,0:00:07.04,Default,,0000,0000,0000,,ka
Dialogue: 0,0:00:07.16,0:00:07.95,Default,,0000,0000,0000,,ru{eol} <--* end time needed
etc.

(Observe that token ends are not seriously timed except for the lines marked with *)
(This topic is currently not well-documented.)
Now we have timed tokens, and timed lines. a3r will automatically generate karaoke lines from those 2 files. The resulted file is called KaraBase, and is the starting point for karaoke typesetting.
NOTE: You could finalize the karaoke timing using a3r's preview, but a3r's preview is really primitive, only suitable for quick-checking. Use another proper tool like VirtualDub to perfect your timing.
When ready, remove unnecessary zero-duration marks {\K0}.
There are two totally different approaches in karaoke effects: temporal and spatial. t/r is temporal, that is, "do something for this token when it is activated" or "100 ms before the activation" etc.
KaraBase:

Classical bouncing effect:

An effect per token can be relative to one of the following temporal control points: Line Start (Dialogue Start Time), Token Activation (when the color change is started for that token), Token Deactivation (when the color change is finished for that token), or Line End (Dialogue End Time).
Example: Suppose we were designing karaoke like this:
If you input the above specs, the tags preview should be something like this (the order doesn't matter):
{\K*}{\t(τ-300,τ-50,1.000,\shad6\frx-3\3a&H00)}
{\t(δ+50,δ+300,1.000,\shad1\frx0\3a&H80)}
{\t(λ+0,λ+600,1.000,\1a&H00\2a&H00\3a&H30)}
{\t(λ+0,λ+600,4.000,\4a&H80)}
{\t(ε-2000,ε+0,1.000,\1a&Hff\2a&Hff\3a&Hff)}
{\t(ε-2000,ε+0,0.250,\1a&Hff\2a&Hff\3a&Hff)}
***{\r}
τ is the token activation time, δ is the token deactivation time, λ is the line start time, ε is the line end time. This timing is for parameter of \t, so everything is relative to the line start time. Hence λ is always zero.
(KaraBase)
Style: Default,Teen Bold,40,&Hffffcc66,&Hffffffff,&Hffcc0000,&Hff800000
Dialogue: 10,0:00:00.29,0:00:09.29...
{\K143}{\K23}Mo{\K30}ni{\K33}ta {\K79}ga{\K77}{pause} {\K33}a...
For instance, for the token {\K23}Mo, τ=1430, δ=1660. For each token in the first line, λ=0, ε=9000. (You don't need to calculate them yourself.) In the resulted file, the token {\K23}Mo now looks like:
{\K23}{\t(1130,1380,1.000000,\shad4\frx-3\3a&H00)}
{\t(1710,1960,1.000000,\shad1\frx0\3a&H80)}
{\t(0,600,1.000000,\1a&H00\2a&H00\3a&H30)}
{\t(0,600,4.000000,\4a&H80)}
{\t(7000,9000,1.000000,\1a&Hff\2a&Hff\3a&Hff)}
{\t(7000,9000,0.250000,\4a&Hff)}
Mo{\r}
Check the real samples: KaraBase_tr_0001.ass, Sample_tr_0001.ass, Sample_tr.0001.avi
NOTE 1: To disable an event, make the Style Modifiers empty. The Event n (>1) will be enabled only when the Event n-1 is enabled. This interface is not good. Also, there are other usable control points, which are not currently supported, such as, First Non-empty Token Activation, Next/Previous Token (De)activation, Last Non-empty Token Deactivation. Maybe I'll fix those problems in a future version.
NOTE 2: You can generate up to 6 \t tags for each token in one run. If you need more, decorate the already decorated script. ({\r} will be repeated meaninglessly, but should be harmless.)
Added in 0.1.1.3 / 2009-03-25
The Change t(0,0) to t(0,1) option: if enabled (checked),
{\t(0,0,accel,modifiers)} in the output, if any, will be changed to
{\t(0,1,accel,modifiers)}.
The reason behind this is that \t(0,0) simply has no effects on the current VSFilter.
You can test the following \t's to see what I mean:
Dialogue: 0,0:00:00.00,0:00:10.00,Style1,,0000,0000,0100,,{\t(300,300,\1c&H00ff00)}Does this become green? (300,300)
Dialogue: 0,0:00:00.00,0:00:10.00,Style1,,0000,0000,0200,,{\t(0,0,\1c&H00ff00)}Does this become green? (0,0)
Dialogue: 0,0:00:00.00,0:00:10.00,Style1,,0000,0000,0300,,{\t(0,1,\1c&H00ff00)}Does this become green? (0,1)
Dialogue: 0,0:00:00.00,0:00:10.00,Style1,,0000,0000,0400,,{\t(1,1,\1c&H00ff00)}Does this become green? (1,1)
This option is enabled by default. If not enabled, t(0,0) will remain as it is, which is compatible with the previous versions (v0.1.1.2 and before, including v0.1.0.x).
Added in 0.1.1.3 / 2009-03-25
The Token Finalizer editbox enables you to edit the token finalizer,
which is typically {\r} that localizes the per-token animation and prevents the next and succeeding tokens from being animated by the same modifiers. Examples:
{\K29}{\t(0,50,1.000000,\shad4\frx4)}{\t(440,690,1.000000,\shad1\frx0)}foo{\r}
{\K17}{\t(190,440,1.000000,\shad4\frx4)}{\t(710,960,1.000000,\shad1\frx0)}bar{\r}
{\K10}{\t(460,710,1.000000,\shad4\frx4)}{\t(910,1160,1.000000,\shad1\frx0)}baz{\r}
The shad and frx for the first token foo are gradually changed
starting from t=0 and ending at t=50, and gradually unchanged starting from t=440 and ending at t=690, but these effects are localized by {\r},
which resets the shad and frx to the Style default, preventing the second token bar and the third token baz from getting the same animation.
Similarly, every token has its own localized per-token effects.
This is all good and fine, until you want to have another animation localized in a different area,
for example, a per-line animation that changes the border color into green, globally for the whole line,
{\t(50,3000,1.0,\3c&H009900)}. Simple approach...
{\t(50,3000,1.0,\3c&H009900)}
{\K29}{\t(0,50,1.000000,\shad4\frx4)}{\t(440,690,1.000000,\shad1\frx0)}foo{\r}
{\K17}{\t(190,440,1.000000,\shad4\frx4)}{\t(710,960,1.000000,\shad1\frx0)}bar{\r}
{\K10}{\t(460,710,1.000000,\shad4\frx4)}{\t(910,1160,1.000000,\shad1\frx0)}baz{\r}
...wouldn't work, because the first {\r} prevents the tokens after foo getting the border effects, by resetting the border color to the Style default.
To overcome this,
you could copy and paste {\t(50,3000,1.0,\3c&H009900)} after each {\r} to re-enable the animation reset by {\r}.
Alternatively, you could get rid of {\r} itself, by rewriting the t-r idioms like this:
{\K29}{\t(0,50,1.000000,\shad4\frx4)}{\t(440,690,1.000000,\shad1\frx0)}foo{\shad1}{\frx0}
{\K17}{\t(190,440,1.000000,\shad4\frx4)}{\t(710,960,1.000000,\shad1\frx0)}bar{\shad1}{\frx0}
{\K10}{\t(460,710,1.000000,\shad4\frx4)}{\t(910,1160,1.000000,\shad1\frx0)}baz{\shad1}{\frx0}
Notice that in this case {\r} resets the shad and frx,
so you can explicitly reset them by writing {\shad1}{\frx0},
without using {\r}. This r-less approach is convenient in some cases,
especially when per-token effects are relatively simple while per-line effects are complicated.
You can easily edit {\r} in the Token Finalizer editbox and add some per-line effect.
In the above example, you can do so
either by changing {\r} to {\r}{\t(50,3000,1.0,\3c&H009900)} if you want to use {\r},
or changing {\r} to {\shad1}{\frx0} if you want to make it r-less,
whichever is more convenient for you. See also the r-less t-r sample preset, selectable in the Sample Presets combo box.
The following pictures explain the concept of "multistate".
Classical K-Karaoke:

Multistate Karaoke ('Compatible' mode):

In contrast with Decorate Karaoke t/r, which accesses karaoke tokens through the time axis, effects are controlled by space in multistate karaoke, like "do this 100 pixels left of the cusp".
\K or \k* is not used. The tool checks the spatial position of each token, and rewrites K-karaoke structure using \t and \clip. (With t-clip, you could also make right-to-left karaoke, top-to-bottom karaoke, etc.) In the first picture above, the active token is shown in the red rectangle; the same logical rectangle is used in multistate karaoke only in the compatible mode; in the pure tokenless mode, the spatial token width in the base karaoke is ignored.
NOTE: 0.0.7.11 and older versions always use the compatible mode,
i.e. the left boundary of the active token seperates the active area and the visited area.
In the pure tokenless mode added in 0.0.7.12, only the right boundary ("cusp") of the active token is used,
while the left boundary is ignored and the active cell always has a fixed logical pixel width.
The difference of these 2 modes is rather subtle.
{\K100}aa and {\K50}a{\K50}a in the base karaoke
are different in the compatible mode, and almost identical in the pure tokenless mode.
Let's observe a more practical sample.
KaraBase:

Multistate Karaoke sample:

In this sample 'me' is slightly blue-ish, while 'teru' is more white. Unlike classical K-Karaoke, which has only one "Waiting" state, this karaoke can have more than one "Waiting" states, the "just before activated" state, the "have to wait a while before activated" state, etc. Similary, you can define multiple "Active" states and multiple "Visited" states.
You might think this is possible by t/r too. Similar thing is surely possible, but with t/r, the smallest unit you can modify is a glyph (letter). In multistate karaoke, a state boundary moves pixel by pixel (you can have a color boundary in the middle of a glyph). Observe that in the second picture above, "n" in "no" has a subtle tint, the left part being slightly paler.
The spatial control points used here are the right edge of the active token (karaoke cusp; karaoke front), and—in the compatible mode—the left edge of the active token. For instance, if the cell width is 10 px, the leftmost waiting cell is [cuspX, cuspX+10], and the next waiting cell is [cuspX+10, cuspX+20], and so on.
Each state has its own style, which you can edit as you like. The sample styles are implemented as karaoke'ed color gradients, but they are just placeholders.
Check the real samples: KaraBase_tclip_0001.ass, Sample_tclip_0001.ass (Conf=Sample(Tclip).a3mk), Sample_tclip.0001.avi
NOTE 1: Multistate Karaoke is slow to generate (because of unwise hardware scanning) and slow to encode (this is intrinsic, can't be helped). Often slower than 1 fps. You can use the [Quick Preview] to check the result roughly and quickly, until satisfied, then use [Render] to generate pixel-accurate ASS commands. Some of the options, including the pure tokenless mode, are ignored in the Quick Preview.
NOTE 2: For the multistate, don't use a small-k ({\k*}) carelessly, even for a space.
A space is not zero-width, and if you use a small-k, the karaoke cusp jumps over that width immediately,
at the infinite speed.
In the classic karaoke, even if the cusp jumps over a space, that doesn't matter.
foo{\K100} {\K100}bar
and
foo{\k100} {\K100}bar generate exactly the same result.
In a multistate karaoke, if the cusp jumps, every point that moves parallelly jumps simultaneously,
which can be ugly. Generally spatial effects mix well with legato songs,
but not so well with opposite kinds of songs.
NOTE 3: Multistate could be very colorful. It would be easy to make Waiting=blue, Active=red, Visited=purple like links on web pages. However, if there were more than one obvious color boundaries, the audience would be confused, not knowing where to sing, not knowing which edge is the real karaoke cusp.
NOTE 4: Multistatke karaoke is not overhang-proof. If there is a pause after a glyph with an overhang that goes over the next glyph, a part of the next (actually still waiting) glyph gets the active color too early, and then the color changing stops there for a while, which is not beautiful at all. This doesn't happen often, but theoretically can happen at any boundary (not only at the cusp). If it does, you should solve the problem manually. For instance, a manually-defined higher layer might help to keep the color of the glyph in question until the time when its color should change.
This tool works significantly faster in 0.0.9.41 and later.
Typesetters sometimes need the spatial information, such as \clip or \pos parameters for a glyph. On a3r, you can manually check the \pos(x,y) by just clicking on the spot, or \clip(x1,y1,x2,y2) paramters by drawing a rectangle by mouse dragging. Additionally, if you need to know such information for each glyph in a Dialogue, you can let a3r scan the subtitle picture.
The scan is hardware-wise, meaning the application checks pixels' colors of the image generated by VSFilter to decide the glyph position (more or less like OCR). This is slow and actually ridiculous — since VSFilter is open-source, a good programmer would just reuse the source code, and check the text position software-wise, using the same algorithm.
This tool works significantly faster in 0.0.9.41 and later.
Anyway, the report would look like this.
Glyph1 [L] = {\clip(290,441,305,462)}
Glyph2 [i] = {\clip(301,441,310,462)}
Glyph3 [n] = {\clip(307,443,325,462)}
Glyph4 [e] = {\clip(321,443,339,462)}
Glyph5 is SPACE
Glyph6 [1] = {\clip(340,441,351,462)}
{\an7}{\pos(291,437)}L
{\an7}{\pos(302,437)}i
{\an7}{\pos(308,437)}n
{\an7}{\pos(322,437)}e
{\an7}{\pos(342,437)}1
...
Repeats "Scan | This Dialogue" for each Dialogue and also saves the result in a file as CSV, or in a more friendly format like this:
Glyph1.Left=290
Glyph1.Top=441
Glyph1.Right=305
Glyph1.Bottom=462
Glyph1.PosX=291
Glyph1.PosY=437
Glyph1.Text=L
...
This tool rewrites a Dialogue like this:
(input)
Dialogue: 0,0:00:01.00,0:00:11.00,Style1,,0000,0000,0000,,Hikitsune, kimi ni kimeta!\NFirefox, I choose you!

(output)
Dialogue: 1,0:00:00.00,0:00:10.00,Style1,Demo,0000,0000,0000,,{\an7}{\pos(166,416)}H
Dialogue: 2,0:00:00.00,0:00:10.00,Style1,Demo,0000,0000,0000,,{\an7}{\pos(183,416)}i
Dialogue: 3,0:00:00.00,0:00:10.00,Style1,Demo,0000,0000,0000,,{\an7}{\pos(191,416)}k
Dialogue: 4,0:00:00.00,0:00:10.00,Style1,Demo,0000,0000,0000,,{\an7}{\pos(205,416)}i
Dialogue: 5,0:00:00.00,0:00:10.00,Style1,Demo,0000,0000,0000,,{\an7}{\pos(213,416)}t
Dialogue: 6,0:00:00.00,0:00:10.00,Style1,Demo,0000,0000,0000,,{\an7}{\pos(222,416)}s
Dialogue: 7,0:00:00.00,0:00:10.00,Style1,Demo,0000,0000,0000,,{\an7}{\pos(235,416)}u
Dialogue: 8,0:00:00.00,0:00:10.00,Style1,Demo,0000,0000,0000,,{\an7}{\pos(250,416)}n
Dialogue: 9,0:00:00.00,0:00:10.00,Style1,Demo,0000,0000,0000,,{\an7}{\pos(266,416)}e
Dialogue: 10,0:00:00.00,0:00:10.00,Style1,Demo,0000,0000,0000,,{\an7}{\pos(279,416)},
Dialogue: 12,0:00:00.00,0:00:10.00,Style1,Demo,0000,0000,0000,,{\an7}{\pos(295,416)}k
Dialogue: 13,0:00:00.00,0:00:10.00,Style1,Demo,0000,0000,0000,,{\an7}{\pos(309,416)}i
Dialogue: 14,0:00:00.00,0:00:10.00,Style1,Demo,0000,0000,0000,,{\an7}{\pos(316,416)}m
Dialogue: 15,0:00:00.00,0:00:10.00,Style1,Demo,0000,0000,0000,,{\an7}{\pos(339,416)}i
Dialogue: 17,0:00:00.00,0:00:10.00,Style1,Demo,0000,0000,0000,,{\an7}{\pos(354,416)}n
Dialogue: 18,0:00:00.00,0:00:10.00,Style1,Demo,0000,0000,0000,,{\an7}{\pos(368,416)}i
Dialogue: 20,0:00:00.00,0:00:10.00,Style1,Demo,0000,0000,0000,,{\an7}{\pos(384,416)}k
Dialogue: 21,0:00:00.00,0:00:10.00,Style1,Demo,0000,0000,0000,,{\an7}{\pos(397,416)}i
Dialogue: 22,0:00:00.00,0:00:10.00,Style1,Demo,0000,0000,0000,,{\an7}{\pos(405,416)}m
Dialogue: 23,0:00:00.00,0:00:10.00,Style1,Demo,0000,0000,0000,,{\an7}{\pos(428,416)}e
Dialogue: 24,0:00:00.00,0:00:10.00,Style1,Demo,0000,0000,0000,,{\an7}{\pos(442,416)}t
Dialogue: 25,0:00:00.00,0:00:10.00,Style1,Demo,0000,0000,0000,,{\an7}{\pos(452,416)}a
Dialogue: 26,0:00:00.00,0:00:10.00,Style1,Demo,0000,0000,0000,,{\an7}{\pos(466,416)}!\N
Dialogue: 27,0:00:00.00,0:00:10.00,Style1,Demo,0000,0000,0000,,{\an7}{\pos(189,442)}F
Dialogue: 28,0:00:00.00,0:00:10.00,Style1,Demo,0000,0000,0000,,{\an7}{\pos(202,442)}i
Dialogue: 29,0:00:00.00,0:00:10.00,Style1,Demo,0000,0000,0000,,{\an7}{\pos(210,442)}r
Dialogue: 30,0:00:00.00,0:00:10.00,Style1,Demo,0000,0000,0000,,{\an7}{\pos(221,442)}e
Dialogue: 31,0:00:00.00,0:00:10.00,Style1,Demo,0000,0000,0000,,{\an7}{\pos(235,442)}f
Dialogue: 32,0:00:00.00,0:00:10.00,Style1,Demo,0000,0000,0000,,{\an7}{\pos(244,442)}o
Dialogue: 33,0:00:00.00,0:00:10.00,Style1,Demo,0000,0000,0000,,{\an7}{\pos(259,442)}x
Dialogue: 34,0:00:00.00,0:00:10.00,Style1,Demo,0000,0000,0000,,{\an7}{\pos(272,442)},
Dialogue: 36,0:00:00.00,0:00:10.00,Style1,Demo,0000,0000,0000,,{\an7}{\pos(288,442)}I
Dialogue: 38,0:00:00.00,0:00:10.00,Style1,Demo,0000,0000,0000,,{\an7}{\pos(307,442)}c
Dialogue: 39,0:00:00.00,0:00:10.00,Style1,Demo,0000,0000,0000,,{\an7}{\pos(320,442)}h
Dialogue: 40,0:00:00.00,0:00:10.00,Style1,Demo,0000,0000,0000,,{\an7}{\pos(335,442)}o
Dialogue: 41,0:00:00.00,0:00:10.00,Style1,Demo,0000,0000,0000,,{\an7}{\pos(350,442)}o
Dialogue: 42,0:00:00.00,0:00:10.00,Style1,Demo,0000,0000,0000,,{\an7}{\pos(364,442)}s
Dialogue: 43,0:00:00.00,0:00:10.00,Style1,Demo,0000,0000,0000,,{\an7}{\pos(377,442)}e
Dialogue: 45,0:00:00.00,0:00:10.00,Style1,Demo,0000,0000,0000,,{\an7}{\pos(399,442)}y
Dialogue: 46,0:00:00.00,0:00:10.00,Style1,Demo,0000,0000,0000,,{\an7}{\pos(412,442)}o
Dialogue: 47,0:00:00.00,0:00:10.00,Style1,Demo,0000,0000,0000,,{\an7}{\pos(428,442)}u
Dialogue: 48,0:00:00.00,0:00:10.00,Style1,Demo,0000,0000,0000,,{\an7}{\pos(443,442)}!
The dialogbox like this will pop up. You can copy special characters, or some of commonly used ASS commands from this editbox.

0.0.9.9+ Gabest's ass-quickref and some other info is also shown.
Version 0.0.7.32 and before, especially 0.0.7.16–0.0.7.27 are buggy. See the remarks below.
Reports about possible subtitle overruns/underruns. The check is done against the keyframes of the currently loaded video. You must load a proper raw in advance. Otherwise checking doesn't work right. A keyframe-only raw (such as huffyuv) is not usable either.
A typical example is, when the subtitle disappears one frame after the scene change. Generally, such a sub should disappear one frame before, sync'ed to the scene change, and the result will be much cleaner.
Another typical problem is a sub that disappears one frame before the last frame before the scene change (subtitle underrun), which also could cause a kind of flickering.
People generally don't notice such a small problem, but still they may feel it somehow uncomfortable if subtitles are loosely timed and overruns or underruns are repeated excessively. On the other hand, it is a bad idea to change the sub timing too much just to sync to the scene change. The reason is obvious: the sub-audio sync will be then messed up. Experiences show that you can safely trim the sub end time up to about 200 ms, i.e. roughly (voice end - 200 ms) is OK. Trimming 200 to 400 ms may be acceptable, but not so safe. The audience might complain that the sub disappeared too early. Instead, you might want to just make the sub end time a little bit later. If it is enough distant from the scene change, it is not flickering anymore.
The threshold in milliseconds is interpreted as the safe distance internally. If the threshold is set to 100 ms and the video is 41.708... ms/frame, the safe distance is 100/41.708 = about 2.4 frames. If the distance between a subtitle event (start/end) and the nearest scene change is smaller than the safe distance, it is considered as a subtitle over/underrun. Actual frame interval is an integer, and the safe distance is rounded up to the nearest integer. It is 3 in the above example, i.e. if the interval is 3 or more, it is considered safe, else it is considered as a possible problem.
0.0.7.16+: Not only over/underruns against scene changes, but inter-subtitle over/underruns are detected and reported as Section 5. An example of inter-subtitle overruns is two Dialogues that overlap meaninglessly only for one frame (e.g. Sub1: frame 100-200 inclusive, Sub2: frame 200-300 inclusive) and triger the auto-collision handling (as a result, the display position of the second sub will be weird). An example of inter-subtitle underruns is two Dialogues seperated by only one subless frame (e.g. Sub1: frames 100-200, No sub: frame 201, Sub2: frames 202-300). This is not as bad as an overrun, but can result in flickering.
0.0.7.27+: Karaoke lines (K/k's and t-clip's) are automatically ignored. Usually karaoke'ed subs are timed and typeset very carefully, and are not needed to sync to scene changes either, so scene-change-based checking for karaoke is generally meaningless.
0.0.7.36+: "Possibly too short duration" is also detected and reported as Section 6. This is a list of Dialogues whose duration is not more than 1.0 seconds.
Reports if a font used in the ASS does not exist (i.e. is not installed) in your system. Such a situation is critical in hardsubbing. Also it detects possible problems related to fonts, including glyphs not supported by the font, font-weight incompatibility between Windows 2000 and XP.
0.0.9.17+: Error-check is more strict. Font Weight (FW) incompatibility between Windows 2000 and Windows XP is detected and reported. This is typically when you specify FW_BOLD ({\b1} or {\b700}) or {\b551+} for the font that does not have bold glyphs intrinsically. Windows 2000 uses intrinsic, non-bold glyphs in that case, while Windows XP fakes up quasi-bold glyphs by forcefully thickening the intrinsic, non-bold glyphs ("Forced Bold"). Forced Bold glyphs, programmatically generated ad hoc, are in general lower-quality than Intrinsic Bold glyphs created by font designers, and may or may not be acceptable in typesetting. Furthermore, this incompatibility could be a problem when glyphs are absolutely positioned in pixel or sub-pixel accuracy, if, for instance, the typesetter uses Windows XP and the encoder uses Windows 2000.
NOTE 1: Incompatibility is not an error. It just means your ASS file may not be portable between Windows XP and Windows 2000, if you use Forced Bold. If you typeset on one OS and is going to hardsub on the same OS, you can ignore this problem, as long as you are happy with the rendered font images you see on that OS.
NOTE 2: There is a similar problem about intrinsic italic vs. computed italic (sometimes called oblique), also reported if found. Oblique fonts are not so bad, since the transformation is simple, altough it may lack subtlety as in human-designed italic fonts.
0.0.9.17+: As a useful side effect, some kind of syntax error (unpaired {}) is also checked and reported.
0.0.9.17–0.0.9.42: If the font is not installed, Unknown error is reported instead of Error: Font not installed (a bug fixed in 0.0.9.43).
0.0.9.42+: Non-existing/unsupported glyphs are reported (See below).
0.0.9.43+: Non-TrueType fonts are reported as such. Before, they were reported as Unknown error, even if they were valid.
0.0.9.43+: Detects glyphs that are "supported" but useless (see below). 0.0.9.44 can check this much faster.
0.0.9.56+: Detects emulated bold/semibold on Windows XP. See the "Messages" section below.
{\bN1} is specified but is not explicitly supported by the font (aka "Forced weight parameter"),
where {\bN2} would be intrinsic (not "forced").
The "forced" weight parameter may result in emulated bold or emulated semibold.
Simply put, use {\bN2} instead of {\bN1} unless you are using {\bN1} on purpose and you know what you are doing.
If emulated bold or emulated semibold is expected, you will receive a separate warning.
Otherwise, you can ignore the problem.
{\b600}, is detected.
Apparently, a font that intrinsically has NORMAL weight ({\b400} or {\b0}) also logically has SEMIBOLD {\b600} on XP, but not on Windows 2000.
{\b700} or {\b1}) is intrinsic, {\b0}, {\b600}, and {\b1} are all different on Windows XP,
while {\b600} and {\b1} are the same on Windows 2000.
If BOLD ({\b700} or {\b1}) is not intrinsic, {\b0} and {\b1} are different but {\b600} and {\b1} are the same on Windows XP,
while {\b0}, {\b600}, and {\b1} are the same on Windows 2000. (There are some other, rare situations, e.g. {\b500} is intrinsic.)
{\fe128} in ASS.
Another example is that a Latin font usually does not have glyphs for Japanese kanji.
The above warning occurs when such a non-existing glyph is specified;
or when the glyph exists but the Encoding parameter is inappropriate.
If the font-linking works, such a glyph is displayed by another font, which may or may not look natural.
If the font-linking does not work, such a glyph is not displayed at all, or may not show correctly.
The font-linking settings are system-dependent (in general, more aggressive on Windows XP than on Windows 2000),
and so if you rely on it, ASS that works on Computer A may not work on Computer B, or may render differently.Added in v0.0.9.65 / 2008-10-10

Sometimes you may want to use ligatures in subtitles for cosmetic reasons. They are often cuter than the corresponding non-ligature sequence.
Not all, but quite a few fonts support several ligatures for specific character combinations,
most typically the ones for "fi" and "fl".
The standard Unicode code points for 'LATIN SMALL LIGATURE FI' and 'LATIN SMALL LIGATURE FL' are U+FB01 and U+FB02 respectively,
but several fonts use U+F001 and U+F002 from the Private Use Area (PUA) for those glyphs.
You can safely use PUA and non-PUA ligatures for hardsubbing, although PUA glyphs are not very advisable for softsubbing for the obvious reason.
Non-PUA Unicode glyphs are, at least in theory, portable.
The other non-PUA ligatures include the ones for "ff" "ffi" "ffl" and "ij".
See http://unicode.org/charts/PDF/UFB00.pdf
The List Ligatures tool makes a list of character sequences used in your script which can be replaced, if you want to do so, with ligatures. For example, if you open the following ASS...
Style: Style1,FreeIdgSerif,...
Dialogue:... Style1,... Prince Tio, blasting off again!
...the tool says,
*Looing for:
U+F001 '' Graphemes "fi" (PUA)
U+F002 '' Graphemes "fl" (PUA)
U+FB00 'ff' Graphemes "ff"
U+FB01 'fi' Graphemes "fi"
U+FB02 'fl' Graphemes "fl"
U+FB03 'ffi' Graphemes "ffi"
U+FB04 'ffl' Graphemes "ffl"
U+0132 'IJ' Graphemes "IJ"
U+0133 'ij' Graphemes "ij"
*NOTE: {\fn}, {\r}, etc. are not parsed.
——Style1——
0 [ Line 22 ] ❖ [U+FB00 ff] Style1 (FreeIdgSerif): Prince Tio, blasting o»ff« again!
1 item found.
Which means, the FreeIdgSerif font has a ligature for the sequence "ff". Note that you cannot blindly replace every "fi" "fl" etc. with ligature code points. This works only when the font supports the ligature you want to use, as an independent glyph.
The Font Viewer tool also tells you which font supports which ligatures.
Added in v0.1.1.2 / 2009-03-18
Suppose you have this script eng.ass,
Dialogue: 0,0:00:01.50,0:00:05.50,style,,0000,0000,0000,,English text1
Dialogue: 0,0:00:11.50,0:00:15.50,style,,0000,0000,0000,,English text2
Dialogue: 0,0:00:21.50,0:00:25.50,style,,0000,0000,0000,,English text3
Dialogue: 0,0:00:31.50,0:00:35.50,style,,0000,0000,0000,,English text4
...
and it's a multisub project, where you have the same script in several languages, for example fre.ass:
Dialogue: 0,0:00:01.50,0:00:05.50,style,,0000,0000,0000,,French text1
Dialogue: 0,0:00:11.50,0:00:15.50,style,,0000,0000,0000,,French text2
Dialogue: 0,0:00:21.50,0:00:25.50,style,,0000,0000,0000,,French text3
Dialogue: 0,0:00:31.50,0:00:35.50,style,,0000,0000,0000,,French text4
...
...and ger.ass:
Dialogue: 0,0:00:01.50,0:00:05.50,style,,0000,0000,0000,,German text1
Dialogue: 0,0:00:11.50,0:00:15.50,style,,0000,0000,0000,,German text2
Dialogue: 0,0:00:21.50,0:00:25.50,style,,0000,0000,0000,,German text3
Dialogue: 0,0:00:31.50,0:00:35.50,style,,0000,0000,0000,,German text4
...
Suppose you don't like the timing in eng.ass, and you updated eng.ass, purely timing-wise, into this eng-v2.ass:
Dialogue: 0,0:00:01.58,0:00:05.35,style,,0000,0000,0000,,English text1
Dialogue: 0,0:00:11.50,0:00:15.50,style,,0000,0000,0000,,English text2
Dialogue: 0,0:00:21.45,0:00:25.72,style,,0000,0000,0000,,English text3
Dialogue: 0,0:00:32.80,0:00:36.00,style,,0000,0000,0000,,English text4
...
Then, you probably want to similarly update fre.ass, ger.ass, etc. so they share the new timing in eng_v2.ass. In such a situation, you can make a time diff patch (.a3td file): first load the new script, eng_v2.ass, and use the Make TimeDiff tool. Once a patch is generated, you can load fre.ass, then Apply TimeDiff to create fre_v2.ass. Similarly you can easily make ger_v2.ass, etc. This may be very handy when you updated many Dialogues purely timing-wise, and want to apply the same changes to a different script that shares the same timing with v1 but does not necessarily share the same Text. Not only in a multisub project, but it can be helpful when you have to maintain multiple versions of the same script (i.e. Dialogues have the same Texts), and, for some reason, they are slightly different in timing and the difference is not a simple time-shift.
A simple font viewer specifically designed for SSA/ASS typesetters. It reports the internal Face Name of the font (you are supposed to use it as "Fontname" in an ASS Style), usable "Encoding" parameters for that font, and the OS/2 table version.

Since 0.0.7.8: The font viewer can list all the supported characters (code points) of a font, including non-BMP ones, and save it as a file. Availability of é ō EM DASH etc. is reported as "quick info" on selecting the font.
This font viewer also reports both a native Unicode name and ANSI name of a CJK (Chinese, Japanese, or Korean) font.
The fonts for many East Asian languages have two typeface names: an English name and a localized name. EnumFonts, EnumFontFamilies, and EnumFontFamiliesEx return the English typeface name if the system locale does not match the language of the font.
EnumFontFamiliesEx hides the Unicode name if your locale doesn't match the language, while it hides the ANSI name, if your locale does match the language. It tells you only one of the two names, according to your system locale. This font viewer fills the gap. You can see CJK names no matter what your system's default language is. (You need to install the East Asian Language Support, or at least some CJK fonts, to see those characters properly.)
On Windows, yes, generally. On Linux, no, at all. The reason "Encoding" parameters are needed is not because the file encoding is not Unicode, but because the font mapper of Windows needs them, for historical reasons.
SSA/ASS's Encoding is Windows-specific, apparently related to the 'OS/2' table of the font, which defines OS/2 and Windows specific metrics. The Encoding parameter is internally lfCharSet.
This parameter is important in the font mapping process. ...If you specify a typeface name in the lfFaceName member ["Fontname" in ASS], make sure that the lfCharSet value ["Encoding" in ASS] matches the character set of the typeface specified in lfFaceName.
In several cases, the script works even if you just set Encoding = 0 for a font that is actually not ANSI_CHARSET. If the result is ok, it may be ok in hardsubbing. When softsubbing, or when the script might be encoded in a different environment, you might want to make your script as portable as possible.
If the font's OS/2 table version is 0, Encoding parameters may not be portable. That is, an ASS that works perfectly on your system may not work on another language version of Windows. To prevent this problem, you might want to use Encoding=1 in such a situation.
Experiences show that Encoding=1 in Style, or {\fe1} as a tag, is recommended or required when:
What is called Encoding in SSA/ASS is the Logical Font's CharSet member, which usually corresponds to ulCodePageRange in the 'OS/2' table. This bit field exists in the OS/2 table version 1 or later.
OS/2 table Version 0 doesn't have this bit field at all, hence the font mapper's behavior about CharSet is more or less unpredictable for such a font:
For the first two cases, Encoding=1 should work 100% while another encoding may not work. Encoding=1 should work for the third case too. So, probably, Encoding=1 is the safest option if the font's OS/2 table version is 0. That's why the font viewer reports this version number.
The tricky part is, if your system CharSet is ANSI_CHARSET (US/W. Europe), Encoding=0 and Encoding=1 happen to mean the same thing; this may make it difficult for typesetters working on a US/W. Europe system to recognize the problem.
NOTE 1: Sabbu 0.3.0 doesn't like Encoding=1, but there should be no impact for timing.
NOTE 2: On Windows 95/98/Me, DEFAULT_CHARSET (1) has a slightly different meaning, and Microsoft says you should use DEFAULT_CHARSET sparingly to avoid unexpected results. In practice, there shouldn't be any unexpected results as long as the font does exist, so use Encoding=1 whenever needed, but only if needed.
Directly reads a font file and reports information from the 'name' table and the 'OS/2' table. With this, you can check the font that is not installed too. This tool gives you more information about names than the Font Viewer, as every string (e.g. Version string, Postscript name) in the 'name' table is dumped. Reports about the 'OS/2' table is somewhat more detailed too.
(0.0.7.41+) Opens an TTC file and converts it into TTF files. Currently, it seems that both Gabest's and Haali's filters don't support non-TTF font embedding in MKV (as Matroska attachment), so if you need to embed a font in TTC, you should convert it to TTF and attach that TTF to MKV. You can do the same conversion with FontForge. FontForge is basically much more reliable, much more advanced, and I highly recommend you to try it, but FontForge may alter ulCodePageRange when creating a TTF from TTC, which is sometimes a critical problem for ASS, since ulCodePageRange is closely related to the "Encoding" parameter or {\fe} in ASS. Also, you need Cygwin to run it on Windows.
NOTE: checkSumAdjustment was not treated correctly in 0.0.7.41 and 0.0.7.42, generally resulting in a wrong CheckSum in the table directory for the 'head' table in the newly created TTF (converted from TTC). This problem, although not having any practical impact, was fixed in 0.0.7.43.
Lists the Fontname and Encoding for each font currently installed, and saves it in a file.
Makes a list of kerning paris for the specified font.
Just launches Calc.exe.
Just reports the current parameters about Keyboard Speed.
Some editing tools cut an MP3 file/track at a point that is not an MP3 frame boundary. If that happens, not only a short noise but possible AV sync confusion is resulted. You shouldn't cut or paste mp3 files in the first place, especially if your application ignores MP3 frame boundaries, but anyway, this tool tries to remove the junk before the first MP3 frame boundary. input.mp3 will be rewritten as input.mp3_a3rfixed.mp3. Use it carefully.
ID3 Tag is treated as a junk.
0.0.7.17+: Lists all the MP3 frames in a specified MP3 file. Frame number (1-based), Timing, and Bitrate are listed for each frame and saved as a text file, _FrameList.txt. Currently, only MPEG-1 Layer III is supported. Free bitrate is not supported either. The ID3v2 Tag is detected and skipped. The 'TAG' Tag is not parsed at all.
0.0.7.15+: This tool tries to detect 2 sentences seperated by only one space. It is meaningful only when you are trying to always put 2 spaces between sentences. Note that there are several patterns that are not wrong but listed as possible problems. For instance, "Mr. Spock" would be reported.
A hard space (\h) may confuse this tool.
0.0.9.6+ Mr. Mrs. and Ms. are treated specially. Also a hard space (\h) is treated properly.
0.0.7.17+: Truncates the given file (must be 3 MiB ~ 1 TiB) by removing about 1 or 2 MiB from the very end. The original file inputfile.ext is kept, and a truncated file, called inputfile.ext.Truncated, is created new. This tool is useful to fix a huge, broken file, when the corrupted bytes are only in the very end.
v0.1.1.11+ (2009-11-05)
A simple helper tool that is useful when you want to adjust word-spacing for justification. Suppose you had a note like this to typeset in \an7:
{\q2}Note: {\i1}Hiyayakko{\i} is a {\i1}tofu{\i} served cold, with toppings such as finely-chopped\N{\fscx1250}\h{\fscx}Welsh onion ({\i1}negi{\i}), very thin dried tuna flakes ({\i1}hana katsuo{\i}),\N{\fscx1250}\h{\fscx}soy sauce ({\i1}shōyu{\i}), and spice mixture ({\i1}shichimi tōgarashi{\i}).

You might want to make the second display line longer for justification. That could be more easily done by adjusting the letter-spacing by {\fspN}...{\fsp} (N=float in VSFilter, N=integer in Textsub.vdf), but sometimes adjusting the word-spacing works better.
First, decide how much more space (padding) you need,
which you can do easily by doing like this. Change the number in {\fscxNNNN} {\fscx} until you find the best value (in this example, 1405 worked):
{\q2}Note: {\i1}Hiyayakko{\i} is a {\i1}tofu{\i} served cold, with toppings such as finely-chopped\N{\fscx1250}\h{\fscx}Welsh {\fscx1405} {\fscx}onion ({\i1}negi{\i}), very thin dried tuna flakes ({\i1}hana katsuo{\i}),\N{\fscx1250}\h{\fscx}soy sauce ({\i1}shōyu{\i}), and spice mixture ({\i1}shichimi tōgarashi{\i}).

Now we know that the second display line will be justified if we pad 1405 units (=14 spaces and 5/100, where 'a space' means the width of the SPACE character).
Open the Justification Helper tool, paste the line in question
Welsh onion ({\i1}negi{\i}), flakes of dried skipjack tuna ({\i1}katsubushi{\i}),
into the One Physical Line editbox,
and set the Total Pad. parameter 1405. Then hit [OK].
You'll get this code:
Welsh{\fscx257} {\fscx}onion{\fscx256} {\fscx}({\i1}negi{\i}),{\fscx256} {\fscx}very{\fscx256} {\fscx}thin{\fscx256} {\fscx}dried{\fscx256} {\fscx}tuna{\fscx256} {\fscx}flakes{\fscx256} {\fscx}({\i1}hana{\fscx256} {\fscx}katsuo{\i}),
If you replace the line in question in your script with the one that was just generated, the paragraph is neatly justificated.

The result in this case is not very satisfactory (a bit too much word-spacing in the second line). I would not use it and try to find a better way, for example by changing both letter-spacing and word-spacing. But this is just a sample to explain how to use the tool, so... Simply put, the tool distributes the specified amount of space equally to each control point (e.g. a space character between the words).
Method options:
Added in v0.1.1.13, 2010‒02‒10.
Tools | Hash
You can calculate a hash value and/or generate a hash file in various common formats such as .SFV (CRC-32: Ctrl+3), .md5 (Ctrl+5), .sha1 (Ctrl+4), and .rmd160 (RIPEMD-160). You can generate a hash file both for a single file and for multiple files. SHA-256/384/512 are also supported on Windows XP SP3 and later.
You can verify a hash value stored in .SFV file, .md5 file, or other hash files in common formats (Ctrl+Alt+H). If the CRC is embedded in the filename itself (as in “Magical Girl Firefox 12 [A312BCDE].avi”) you can directly verify it, by hitting [Ctrl]+[Alt]+[H] and selecting the file. The CRC in the filename is automatically used. Append CRC to Filename does the opposite. For example, if you process a file called “Magical Girl Firefox 12.avi”, it will be renamed to “Magical Girl Firefox 12 [A312BCDE].avi” if A312BCDE is the CRC-32 value of the file.
Added in v0.1.3.0, 2010‒09‒16.
Tools | Interpolate/Extrapolate
Typically, you can use this tool for moving Sign Subs. With this, any ASS effect, including \p, \clip, \iclip, is “manually” animatable using a regular version of VSFilter. This way of thinking is known as in-between animation or nakawari.
Suppose you have this initial Sign Sub as Frame #10:

Dialogue: -200,0:00:00.41,0:00:00.45,NullStyle,Frame#10,0000,0000,0000,,{\an7\1c&Ha4b0df}{\p1}m 464 302 l 469 332 568 334 562 295 518 311{\p0}
Dialogue: -100,0:00:00.41,0:00:00.45,NullStyle,Frame#10,0000,0000,0000,,{\an7\fnVerdana\fscx10\fscy10\fs240\fax0.210\fay-0.100\blur0.6}{\pos(470.50,310.50)}Sign Sub
...and you have this final Sign Sub as Frame #90:

Dialogue: -200,0:00:03.75,0:00:03.79,NullStyle,Frame#90,0000,0000,0000,,{\an7\1c&Ha4b0df}{\p1}m 345 198 l 351 245 470 251 464 186 414 213{\p0}
Dialogue: -100,0:00:03.75,0:00:03.79,NullStyle,Frame#90,0000,0000,0000,,{\an7\fnVerdana\fscx10\fscy10\fs305\fax0.190\fay-0.080\blur0.6}{\pos(349.00,215.50)}Sign Sub
If you interpolate the two, using the format:
Dialogue: -200,0:00:01.25,0:00:01.29,NullStyle,Frame#%d,0000,0000,0000,,{\an7\1c&Ha4b0df}{\p1}m %d %d l %d %d %d %d %d %d %d %d{\p0}
Dialogue: -100,0:00:01.25,0:00:01.29,NullStyle,Frame#%d,0000,0000,0000,,{\an7\fnVerdana\fscx10\fscy10\fs%d\fax%.3f\fay%.3f\blur0.6}{\pos(%.2f,%.2f)}Sign Sub
...then, the result will look like the following animated GIF:
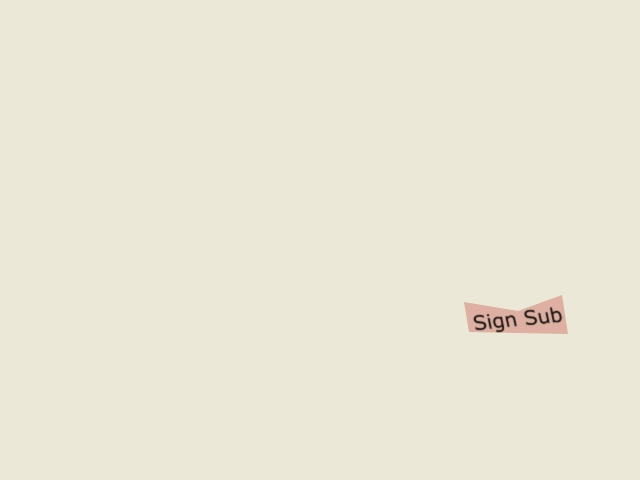
You can use C printf-like format strings. Dialogues for in-between frames are automatically generated, which you can just paste. Note, the initial commands and the final commands must agree, i.e. share the exact same format. (Basically, \fscx10\fscy10 here means that for example \fs123 works like “\fs12.3”. You’ll do things like this because in reality VSFilter only accepts an integer with \fs (and with \fscx/y too) but you need higher precision.) You can also extrapolate; for example, it is possible to generate frames #5-100, from the two frames #10 and #90. You may need to tweak initial and final parameters several times before achieving satisfactory results. Use the format string &H%02x%02x%02x to interpolate color codes.
Added in v0.1.4.1, 2011‒02‒07.
in the Simple Timer tool: File | Name to Style Name (Alt+Y)
in the main window: File | Name to Style Name
You can use this tool when you need to typeset multiple episodes sharing the same per-person styles. For example, suppose there are two characters, Misa and Shia, and Misa's lines always get MisaStyle and Shia's lines always get ShiaStyle. You can predefine these name-to-style mappings as a text file in Unicode (UTF-8 or 16 with BOM), which looks like:
Misa,MisaStyle
Shia,ShiaStyle
,DefaultStyle

,,[V4+ Styles]
Style: MisaStyle,...
Style: ShiaStyle,...
Style: DefaultStyle,...
The line format is
<Name>,<Style>
and if the Name is empty, the style is treated as the default, i.e. any name not explicitly mapped to a specific style will get that style.
Paste actual definitions of the styles below
,,[V4+ Styles]
and they will be inserted to the end of the [V4+ Styles] section.
In the Simple Timer tool, you can apply the above file (with suggested extension .n2sn) after loading the text to time and anytime before you save a newly-created ASS file. A proper style is applied to each row, according to its Name (Actor) field. If you edit the Name field in the Simple Timer tool, the Style name automatically changes accordingly. It is also possible, though probably less useful, to apply an .n2sn file to an already-timed ASS file, by using the File menu of the main window, or by loading the ASS file into the Simple Timer tool, applying an .n2sn file, and re-saving the ASS file without re-timing it.
Added in v0.1.4.1, 2011‒02‒07. Status: Beta.
in the Font Viewer tool: Tools | Font File Filter (Ctrl+Shift+G)
in the main window: Tools | Misc (Other Tools) | Font File Filter
Suppose you have many (say, 3,000) font files in a folder, and you're only interested in fonts that support a specific code point (say, U+014D ō LATIN SMALL LETTER O WITH MACRON), perhaps because you're looking for a good font to typeset some text, but the text contains that special character. The Font File Filter tool helps in a situation like that. It checks every font file in the folder, and copies the font file to a different folder if and only if it supports the specified code point.
The search is recursive: any subfolder in the folder specified will be also looked into. The tool is empty-aware: even if the font file itself says (in its internal mapping table called cmap) that it supports the character, the font doesn't pass the test if that glyph is actually empty, i.e. outline-less (meaning, it's invisible—it doesn't really have a glyph for that character), unless the character is ok-empty (as in a space character). The tool can handle both normal TTF/OTF font files and TTF/OTF files with a CFF table; though it's not 100% empty-aware when it has to parse a CFF table, it should work fine for most practical purposes. Non-BMP code points (U+10000 and higher) are also supported.
This tool is like the Font Filter tool (Ctrl+G) in Font Viewer, except it looks into font files, not installed fonts. If you're filtering the fonts that are already installed in your system, use the Font Filter tool instead. Use the Font File Filter tool when the font files to be filtered are not installed, but just there in a folder as files.
Added in v0.1.5.1, 2011‒04‒16.
in the Font Viewer tool: Tools | Get Path (Ctrl+P)
This converts a character or characters in the editbox, rendered with the TrueType font specified,
into ASS drawing tags which look like {\p4} m... l/b ... {\p0}. Use this to embed a specific glyph in an ASS file without embedding the whole font file. Just like normal text, you can apply bord, shad, fscx, fscy, etc. to the embedded characters. Use {\pbo} when you have to mix normal characters and embedded ones in one line, if you need to change the baseline offset. Note that the argument of {\pbo} is scaled, meaning that 8 means 1 pixel if {\p4} is used.
Example:
![]()
In ASS:
So true {\p4\pbo48} m 45 158 l 28 149 l 27 148 l 26 148 b 20 141 17 133 15 125 b 14 118 14 110 14 102 b 17 86 23 70 30 56 b 38 41 42 25 45 7 l 56 3 l 62 6 b 67 26 74 45 83 62 b 93 79 98 98 99 119 b 98 124 96 130 94 134 b 92 139 89 143 84 146 b 79 151 73 154 67 156 b 61 158 53 159 45 158 l 45 158 m 77 126 l 79 108 l 77 103 b 75 93 72 85 68 77 b 64 69 60 61 57 53 l 55 48 l 54 44 l 53 43 l 51 43 l 51 46 b 45 67 40 83 34 94 b 33 100 31 106 31 114 b 36 128 41 135 45 137 b 50 138 54 138 58 138 b 67 136 73 132 77 126 l 77 126 {\p0}
The image above shows an embedded droplet following "So true". Instead of U+1F4A7 [ 💧 ] DROPLET, the glyph for U+266D [ ♭ ] MUSIC FLAT SIGN from Mikachan-PB is used. Since the outline data is embedded, you can see the same image even if you don't have Mikachan-PB installed, as long as the renderer is compatible with VSFilter.
Added in v0.1.5.3, 2011‒05‒09.
in the main Window: Tools | Transform (Ctrl+Shift+I)
A simple example:
(Initial)
Dialogue: 1,0:00:00.00,0:00:10.00,style1,,0000,0000,0000,,{\pos(100,200)}aaa
Dialogue: 2,0:00:00.00,0:00:10.00,style1,,0000,0000,0000,,{\pos(300,400)}bbb
(Format)
dx=0.5 dy=-2
(Final)
Dialogue: 1,0:00:00.00,0:00:10.00,style1,,0000,0000,0000,,{\pos(100.500,198.000)}aaa
Dialogue: 2,0:00:00.00,0:00:10.00,style1,,0000,0000,0000,,{\pos(300.500,398.000)}bbb
The tool can do some other transformations too, such as kx=a (x->ax), ky=b (y->by).